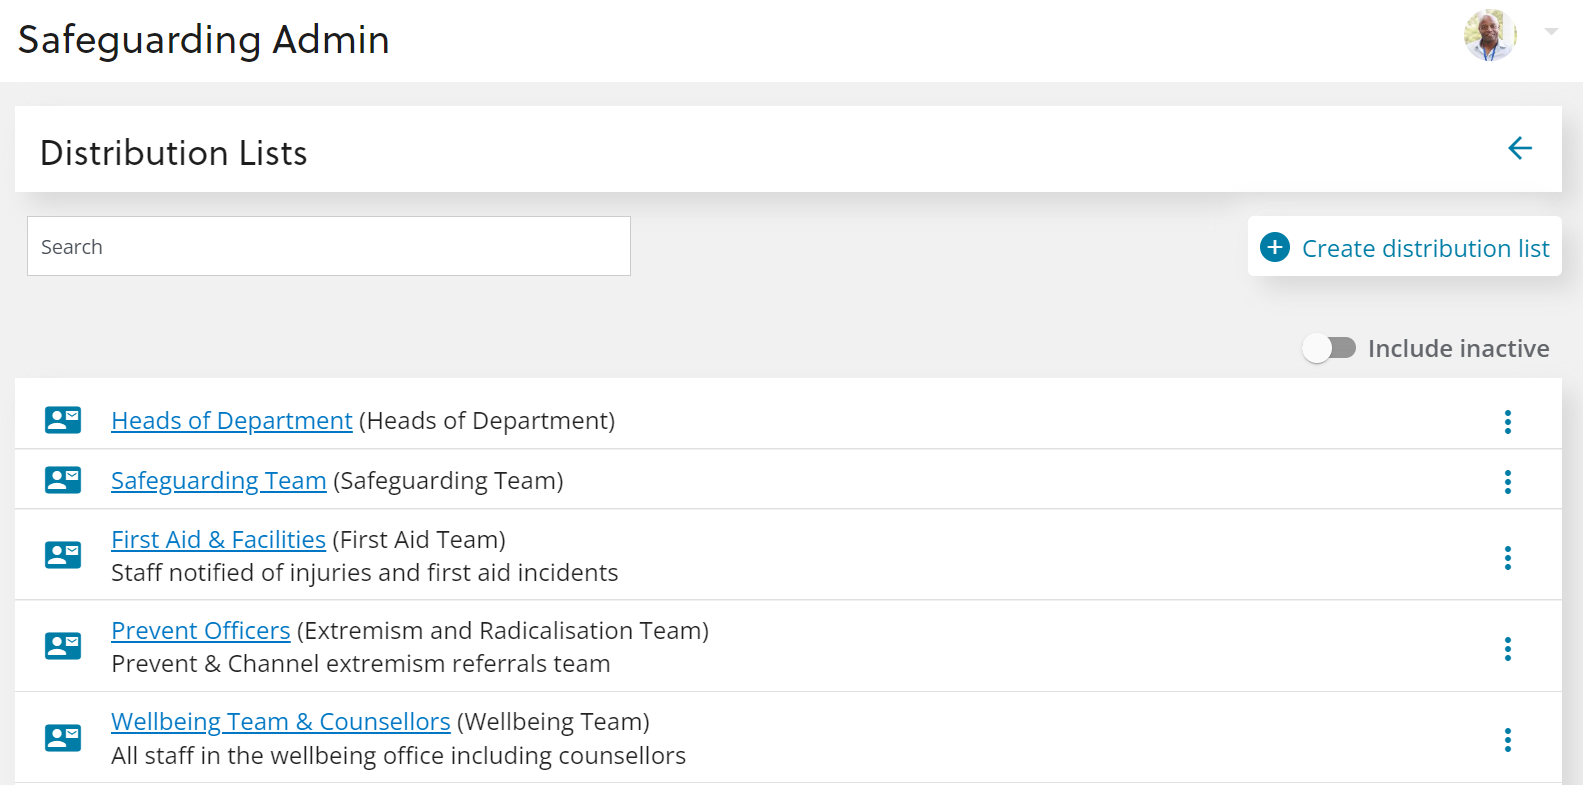
Distribution lists
Setting up distribution lists make it easy to ensure the right people are informed of reports and notes. Distribution lists can automatically be assigned to different types of reports. If staff members change you just need to update the distribution list and all new records and notes will be sent to the updated list.
You can give your distribution lists names that make it easy to choose the right list, as well as student facing names to avoid confusion.
Create a New List
-
Select the Create distribution list button.
-
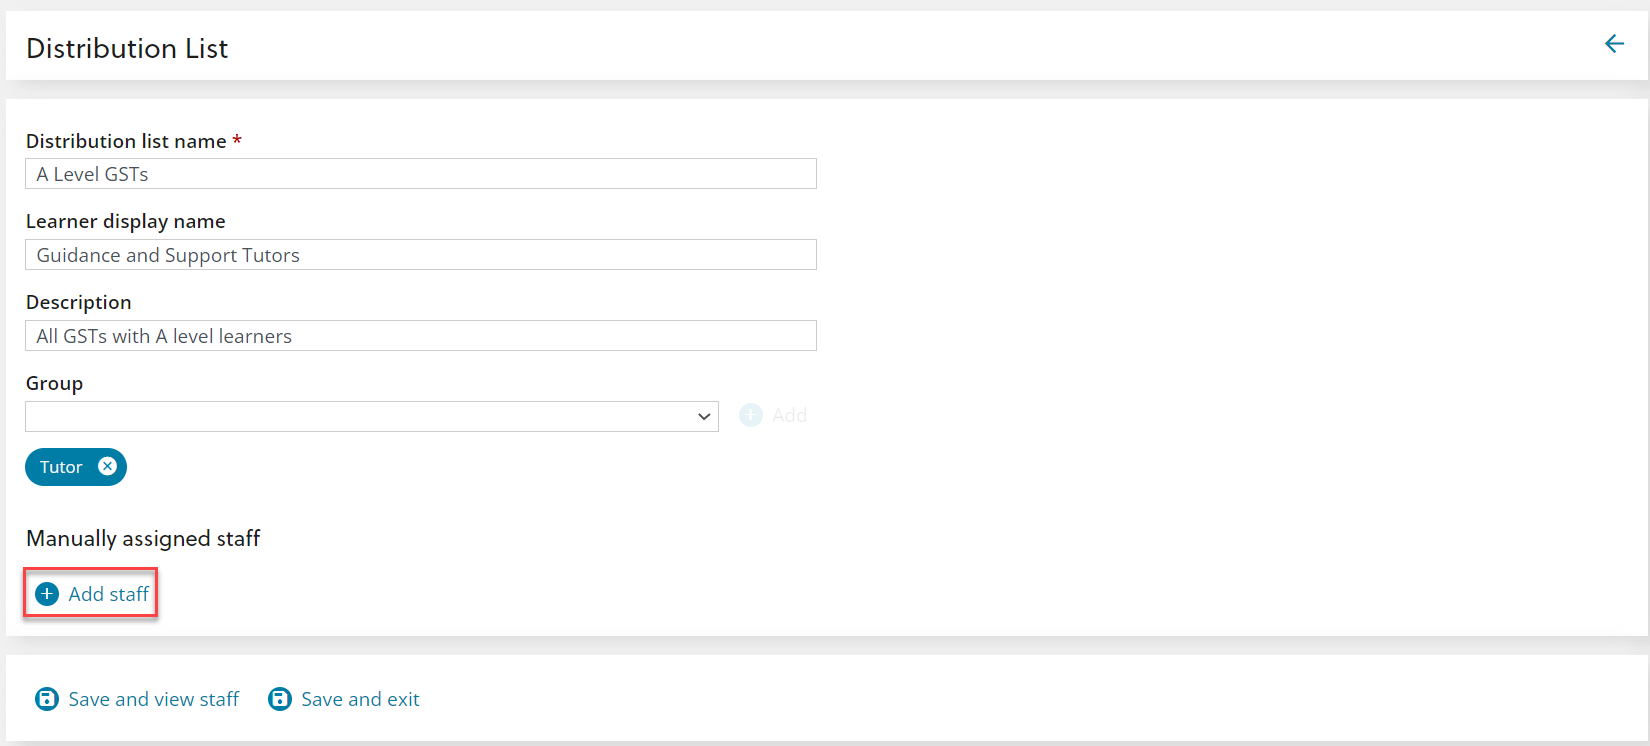
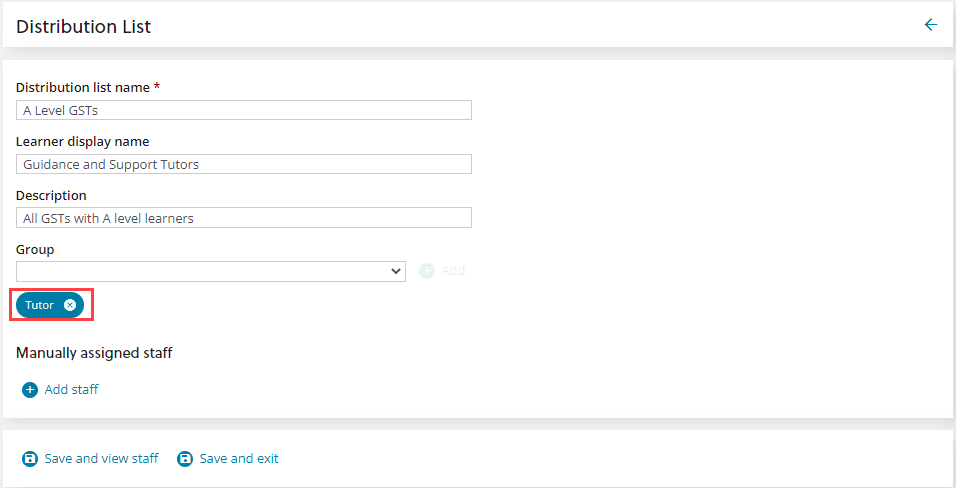
Complete theDistributions List Name . eg. A Level GSTs. Clear names will make it easier for reporters to know which lists to choose.
-
(optional) Give the distribution list a Learner Display Name . This is the name that will show if the list is on a message shared with a learner. eg. Guidance and Support Tutors.
-
(optional) Add a Description of the list. This will only show on the distribution list page. eg. All GSTs with A level learners.
-
(optional) Select the Groups drop down to add a group to the distribution list. This lets you use EBS groups to quickly add groups of people. eg Tutor.
-
(optional) Select the Add staff button to add a specific staff member to the list.
-
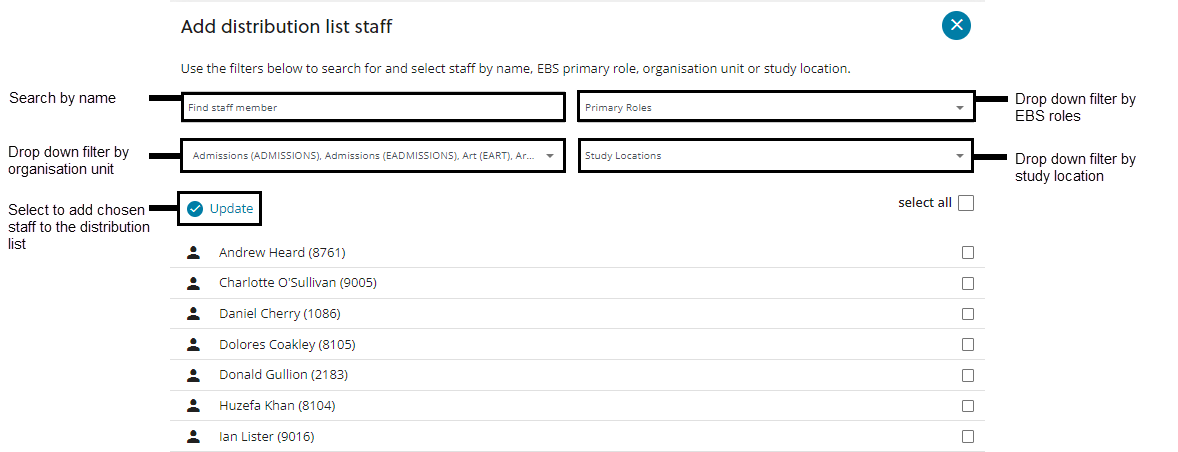
Use the filters and search to select all the staff members you want to add to the distribution list. You can add more than one staff member at once by selecting the checkboxes next to their names.
-
Select the Update button to add the chosen staff to the list.
-
-
(optional) Select theSave and view staff button. This will give you a searchable list of the staff who have been added to the list. It's a good way to check if everyone you expect is on the list.
When you close this screen you will return to the create list page.
-
Select the Save and exit button.
-
A confirmation message is shown and the distribution list is added to list.
Edit an Existing List
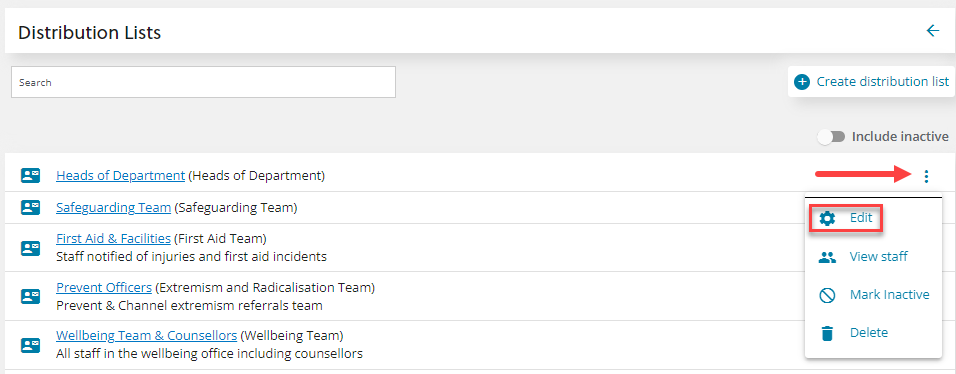
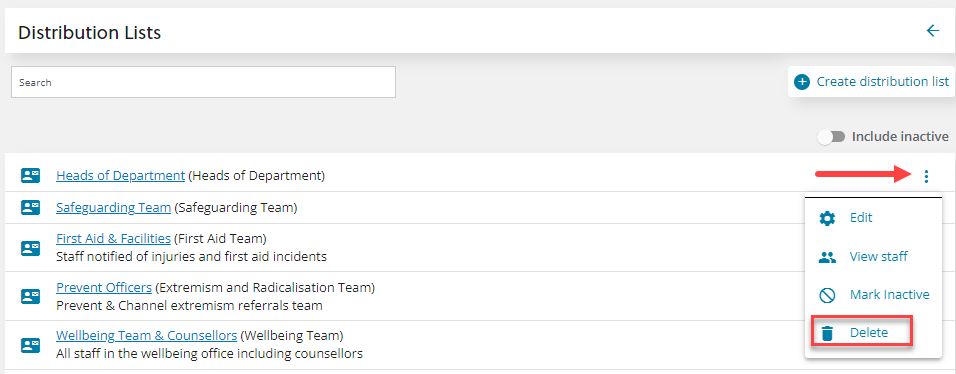
To edit a list you can either select on the name of the list or select the Menu button next to the list, then Edit .
You can then follow the instructions for creating a list to make your changes.
Remove a Staff member from a list
How you remove a staff member from a list depends on how they were added. If they were added manually they will be listed underManually assigned staff . Select the trash icon to remove them from the list.
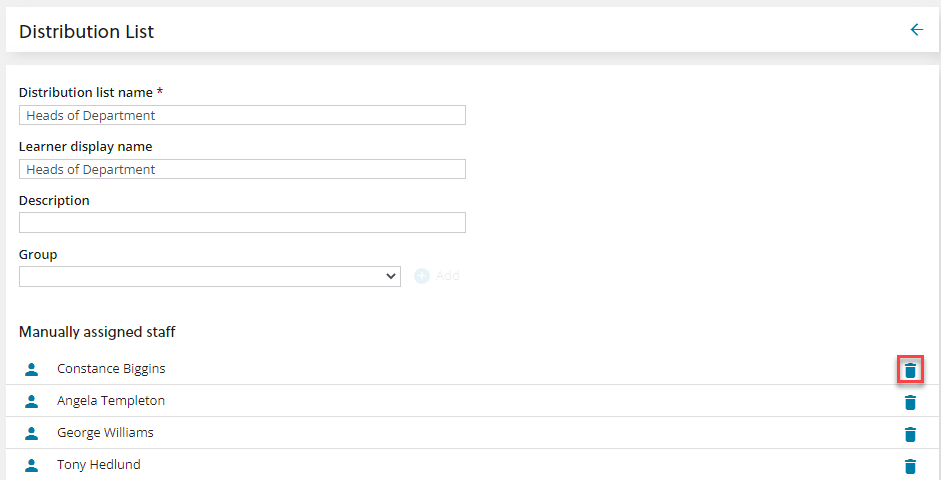
If they were added as part of a group you will have to remove the whole group. To remove the whole group select on the name of the group.
Search for a List
If you have a lot of distribution lists you might want to check what already exists to avoid making overlapping ones. You can search for a keyword to see if a list already exists.
Remove a List
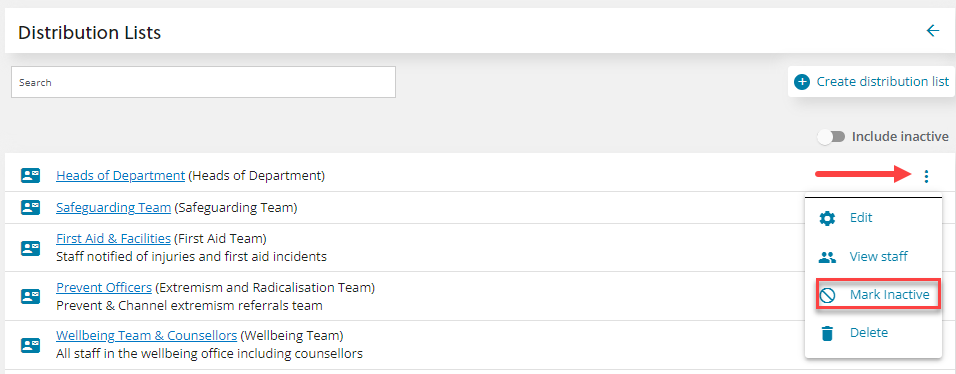
There are two ways to remove a distribution list. If it has never been used you can delete it. If it has been used you can mark it as inactive . This will hide the list. It will no longer be an option for note or record templates. It will also not be shown on the distribution list page unless you search for it with the Include inactive toggle turned on.
Delete a List
You can only delete a list if it has not been used.
-
Find the category you want to edit.
-
Select theMenu Button , thenDelete .
-
A confirmation message will show and the list will be deleted.
Mark as Inactive
To mark a list as inactive:-
-
Find the category you want to edit.
-
Select theMenu Button , thenMark inactive .
-
A confirmation message will show and the list will be removed.
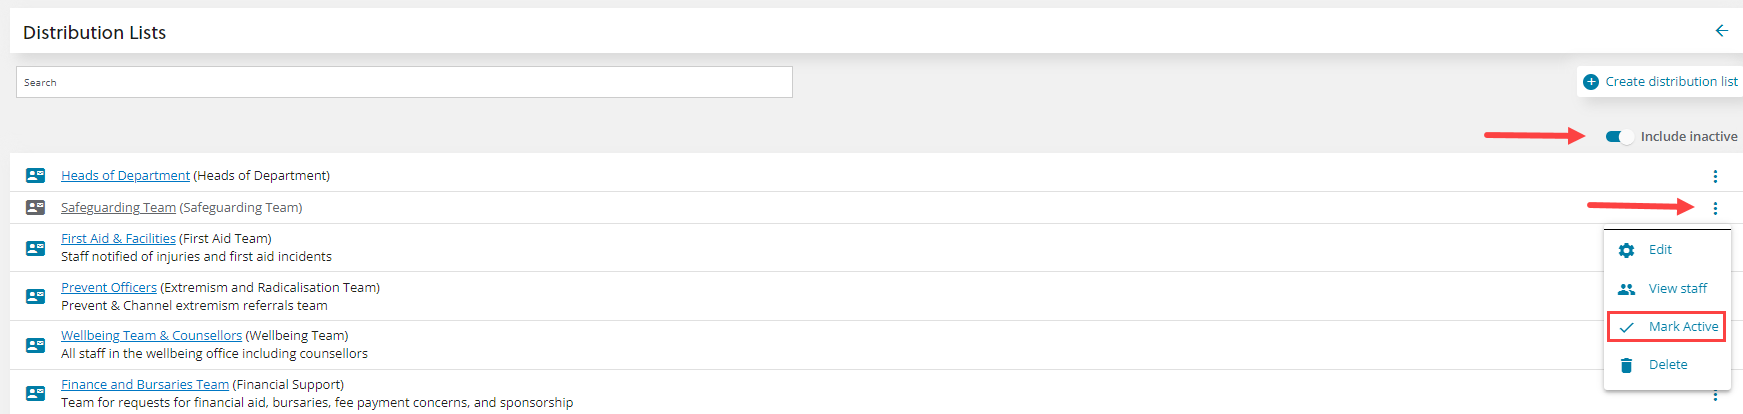
Mark as Active
If you want to restore a list so it can be used again you can easily do so.
-
Ensure the Include inactive toggle is turned on.
-
Find the category you want to restore.
-
Select theMenu Button , thenMark Active .
-
A confirmation message will show and the list will be returned to the main list.